 Previous
Index Next
ISCS version 0.1.1
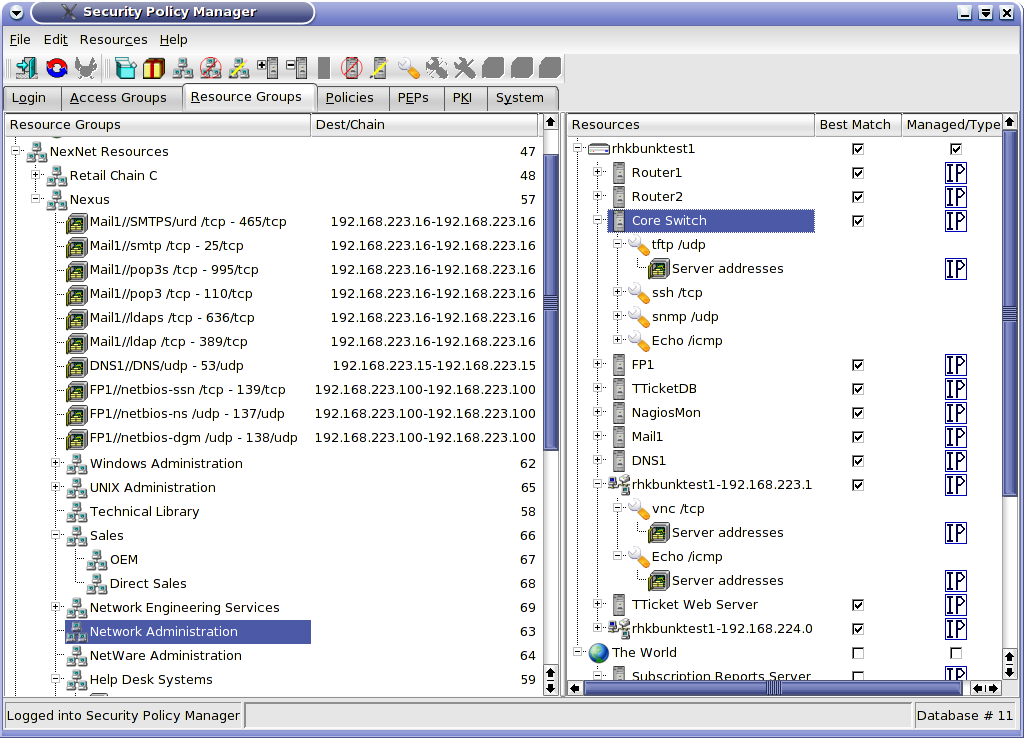
The Resources and related screens are a little more complicated than the Accessor screens. Figure 1 is a typical Resource Groups screen.
Figure
1
Resource Groups are created in the same way as Access Groups. However, Resources are handled quite differently from Accessors. The top of the hierarchy in the Resources panel are the PEPs. All protected resources live behind PEPs. These PEPs can be managed (this which the SPM administers) or unmanaged (such as the Internet or gateways of business partners to which we do not have configuration access). PEPs cannot be managed from this screen; they must be configured from the PEP tab. Two items may live under a PEP -- a Service (in which case the PEP is functioning like any other Server furnishing a Service) or a Server.
Notice the object named "rhkbunktest1-192.168.224.0". This is a "network server". Servers are not just limited to physical servers. Servers may take several IP addresses. This could be because they are multi-homed but also because they represent more than one server, e.g., a server farm or, in the case of rhkbunktest1-192.168.224.0, every device on the network. This is another means of reducing configuration time.
Let's imagine that our company provides remote control Help Desk services to our clients. We connect to their networks via ISCS to take over any desktop on the network when needed. Rather than having to define every possible workstation on 192.168.224.0/24, we can define a "network server" with the address range of 192.168.224.1-192.168.224.254. We can then add Resources for remote control to this single server, place that Resource in a Resource group named ClientDesktops and grant our Help Desk access to that Resource Group. They now have access to all the desktops on 192.168.224.0/24. If we gain a new client with a subnet of 10.1.1.0/24, we merely create another network server object with the address 10.1.1.1-10.1.1.254, add the Remote Control Service and drag it into the ClientDesktops Resource Group. We do not even need to create a new policy. Our Help Desk instantly has access to the new subnet.
The safety of such an approach is ensure by "Best Match" technology. ISCS will match Accessors and Resources based upon the best match of the IP address is Best Match is enabled. Best Match is generally disabled for Accessors and enabled for Resources (except for Internet Resources). Let's suppose that there is an e-mail e-mail server on the new 10.1.1.0/24 network at 10.1.1.5. We do not want the Help Desk to have remote control access to that server but it appears they do have access by virtue of their access or 10.1.1.1-10.1.1.254. Well, as soon as the security administrator defines the new server at 10.1.1.5 and enables Best Match, ISCS recognizes there is a better match for 10.1.1.5 than 10.1.1.1-10.1.1.254. It will not apply the access controls that pertain to 10.1.1.1-10.1.1.254 to 10.1.1.5.
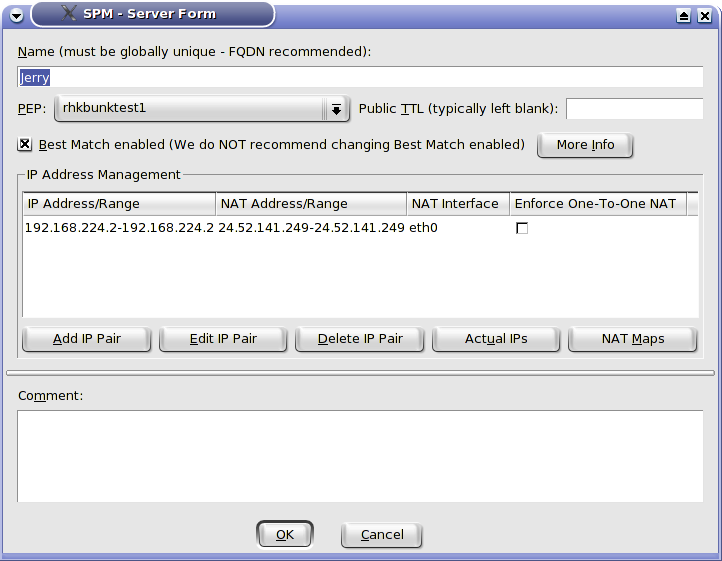
The Server screen is quite powerful and is shown in figure 2. We will explain each field.
Figure
2
We specify the name and the protecting PEP. Public TTL is an interesting feature. It tells the PEP to alter the TTL for any packets from this Server when they are destined for the Internet (more accurately, a public interface). Consider the case of a e-business with a web server in a DMZ exposed to the public which talks to a database server which stores customer information such as credit cards on the internal network. If we override the public TTL for the database server and a cracker cracks through the web server to the database server and attempts to send the credit card information to their computer across the Internet, the packets will die just past the PEP and never arrive at the cracker's computer.
We have already discussed Best Match. The IP address management tools allow one to specify the real address, the NAT address (for exposing internal devices to the Internet for inbound access - not to be confused with NAPT for allowing general outbound Internet access or Internal NAT for translating conflicting IP addresses internally), the NAT interface (normally set automatically but required in complex NAT configurations where the NAT address is not on a network associated with the public interfaces of the PEP), and whether there must a one-to-one mapping of the addresses.
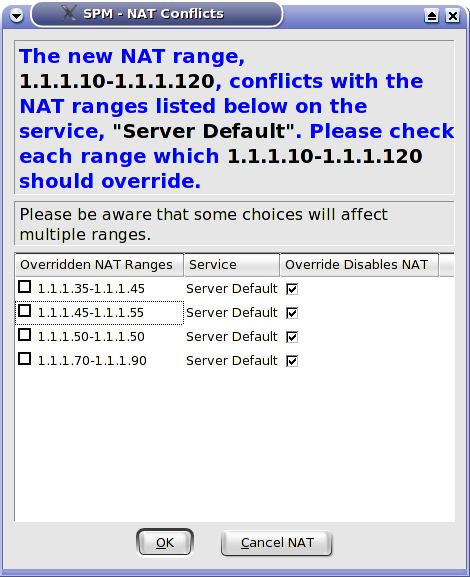
ISCS can handle extraordinarily complicated NAT configurations including some-to-many, many-to-some, overlapping and nested NAT. Conflicts are resolved by user input as shown in figure 3.
Figure
3
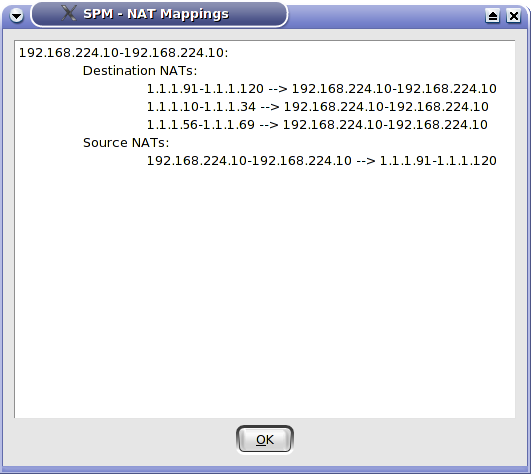
The NAT Mappings button shows the actual NAT maps based upon all conflict resolution and user input as shown in figure 4.
Figure
4
The Actual Ips button shows the results of Best Match, i.e., how a larger network has been divided to exclude Best Match enabled SubRanges as shown in figure 5.

Figure
5
Once we have created a Server, we can add Services to it. Services are added from the Services Manager. Right click on a new Server and choose Add Service or choose the item with the same name from the context menu or the Resources menu. The Services Manager lists literally every Service defined by IANA as well as any custom Services you have defined. If this is the first time you have called the Services Manager, it will take a little while to load. It will first show all Services as in figure 6.
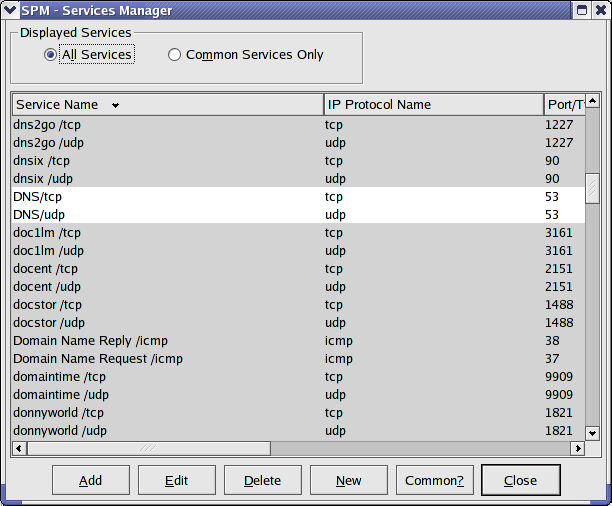
Figure
6
It can be toggled to show only Common Services as in figure 7. You can toggle as Service as either common or uncommon.
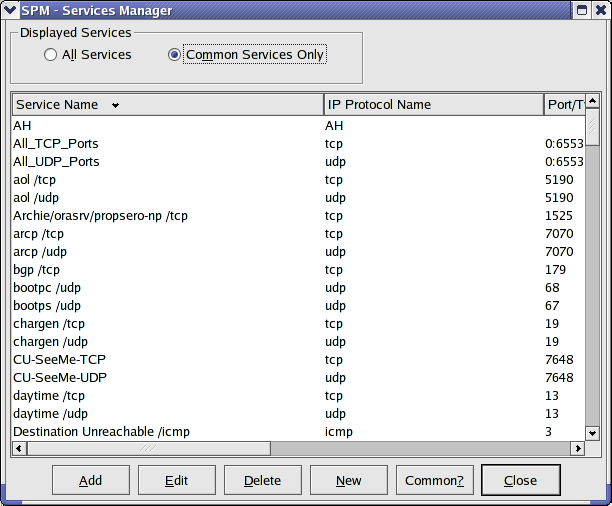
Figure
7
Select the Services you want to add to the Server and click on Add. The Service and a default Resource will be added under the Server. The Resource screen itself is also quite powerful and bears a separate exploration. It is displayed in figure 8.
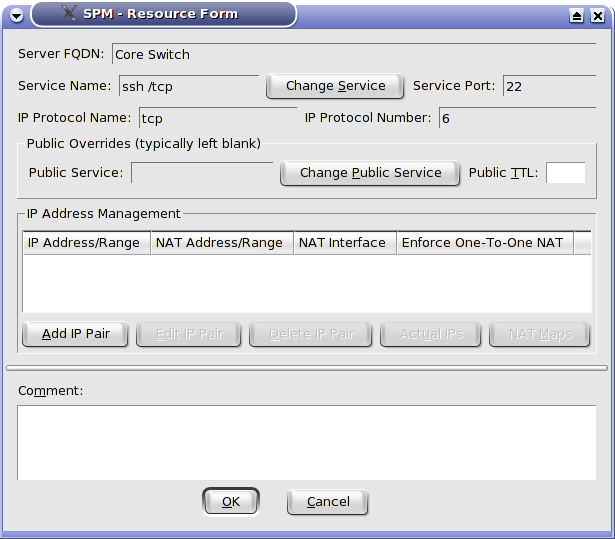
Figure
8
Resources normally take the values of their Server such as real and NAT IP addresses. It is possible for a Resource to override its Server's settings. Let's say that we have a multi-purpose Server that offers most of its Services on 172.18.3.4 but we want its HTTP service to be only available on 172.18.3.5. We simply override the IP address for the HTTP Resource. One can override the public TTL. One can also select a public Service, i.e., we can use one port number for public traffic and another for private, e.g., an internal web server operating on port 8080 that is exposed to the world as port 80.
Resources are the only items which may populate Resource Groups (besides other Resource Groups) one can add Resources to Resource Groups by dragging the Resource, a Service (which can have multiple Resources with different override values), a Server or even an entire PEP. All Resources under the dragged item will be added to the Resource Group.